
Village in the Shade Mining Guide: Quarry Ores and Material Routes
Plan Quarry mining runs in Village in the Shade with ore floors, cart checkpoints, stamina tips, and a clear smelting handoff.
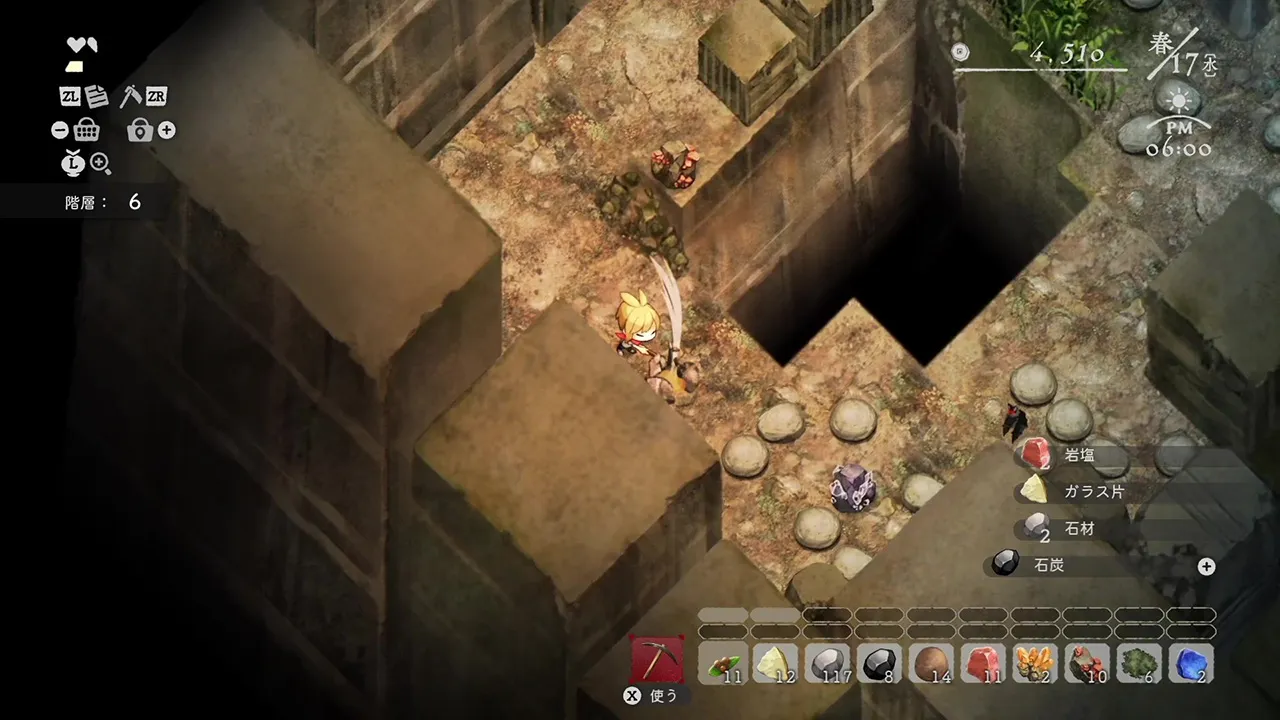
How should you plan a Quarry mining run?
The best way to approach Village in the Shade mining is to treat the Quarry as a checkpointed route rather than one uninterrupted dungeon run. Start with a manageable 10-floor objective, use mine carts to preserve progress, and decide before entering whether you are pushing deeper or collecting a specific material.

The Perfect Farming Sim for Halloween is here! Village in the Shade · Josh's Gaming Garden
General reference: third-party English-language gameplay of the original 2026 game. This is not a dedicated tutorial for the topic below, a device benchmark, or evidence of extracted values, quest order, or Patch 1.30 behavior.
Cover context: Official Japanese promotional screenshot of mining in the Quarry. It illustrates the original game’s mining environment, not a verified floor-eligibility table, drop rate, current English interface, or console patch test.
Copper can appear from floor 1, Iron from floor 41, Gold from floor 81, and Meteoric Iron from floor 91 in the available normal-floor data snapshot. Those are earliest eligible floors—not guaranteed deposits on every visit. Deeper floors generally favor more valuable materials, according to the official Quarry introduction.
Quarry access and checkpoint basics
The Quarry is accessed through story progression rather than being treated as an immediately available free-roam area. A hands-on report from NookGaming describes reaching it through an early story event and finding ropes beneath ordinary rocks. Because access timing and interaction details can vary by version or platform, use the in-game event and visible route as your confirmation rather than relying on an exact unlock day.
Once inside, look for the mine carts associated with the 10-floor milestones. The official Quarry information says these carts provide shortcuts back to the entrance and allow you to resume mining from a checkpoint. In practical terms, your first priority is not clearing every rock you see. It is reaching and activating the next useful cart.
Use this access checklist:
- Confirm that the Quarry entrance is available after the relevant story progress.
- Check the entrance and nearby ordinary rocks for the route downward.
- Set a short goal, such as reaching the next 10-floor checkpoint.
- Activate or use the cart when you reach a milestone.
- Leave before stamina or inventory pressure turns the trip into a wasteful retreat.
The NookGaming report also attributes tool-upgrade requirements to some ores. It does not establish a complete tool-tier matrix, so check the obstruction or mining result in your own game. The tool upgrades guide can help with the broader upgrade-planning decision, but do not assume that an upgrade listed there proves a specific Quarry gate.
Earliest normal-floor ore records
The following table uses the extracted normal Quarry records from Steam build 25311578. The records are a reproducible data snapshot, not our playtest and not proof that every value was retested on current English Patch 1.30 or every console. The labels below are editorial English translations of the extracted item data, not verified English UI strings.
| Material | Earliest eligible normal floor in the snapshot | What that means |
|---|---|---|
| Copper Ore | 1 | Copper is represented from the first normal floor. |
| Iron Ore | 41 | Iron does not appear in the snapshot’s normal-floor records before floor 41. |
| Gold Ore | 81 | Gold first appears in the snapshot at floor 81. |
| Meteoric Iron | 91 | Meteoric Iron first appears in the snapshot at floor 91. |
Extracted normal Quarry floor records
These numbers answer “when can this material first be eligible?” They do not promise a deposit, a drop, or a particular amount on that floor. The source also includes relative rock weights, but those values are not drop probabilities, ore counts, or mining rates. Do not turn them into percentages.
A useful distinction is the difference between an earliest floor and a favored farming band:
- Copper is available early, but later floors can be a poor use of time if you only need basic copper.
- Iron becomes a realistic deeper-route target after floor 41; the snapshot shows stronger example weights on several later bands than on its first eligible floor.
- Gold becomes relevant from floor 81, with the snapshot showing examples at floors 81, 91, 101, and 111.
- Meteoric Iron begins at floor 91, while the example records are more favorable at some later floors.
The later bands are suggestions for targeting based on the snapshot’s relative records, not guaranteed optimal routes. If you need a small amount for an immediate upgrade, reaching the first eligible area may be more sensible than forcing a deep run.
Choose a progression run or a material run
Before entering, choose one of two goals. Mixing them without a limit is the easiest way to spend stamina, fill your bag, and still miss the item you needed.
Progression run
A progression run aims to reach the next cart and open more of the Quarry route.
Use this plan when:
- You have not yet established the next 10-floor checkpoint.
- Your tool can handle the route’s current obstacles.
- You have enough stamina for movement, mining, and an exit.
- You are willing to ignore low-priority deposits.
For a progression run, prioritize the route downward and mine only enough to avoid wasting obvious opportunities. Treat every cart as the success condition. A 10-floor goal is a recommendation for managing the run; it is not presented here as a story unlock condition.
The Quarry data snapshot records 120 total floors. A NookGaming play report attributes a boss encounter to floor 120. That report is not our test, and boss strategy is outside this guide’s scope, so prepare for the possibility of a final-floor encounter rather than treating floor 120 as an ordinary farming stop.
Targeted material run
A targeted run is for a specific ore. It should begin only after you know the material’s earliest eligible floor and have a realistic checkpoint route to that area.
| Your objective | Better approach |
|---|---|
| Copper for an early requirement | Work the accessible lower floors and leave once your needed supply is secured. |
| Iron | Push beyond floor 41, then favor a checkpoint band where your tools and stamina remain comfortable. |
| Gold | Plan around floor 81 or later rather than repeatedly searching earlier floors. |
| Meteoric Iron | Treat floor 91 as the first eligibility point, then consider later recorded bands if the trip is sustainable. |
Do not read “later band” as “guaranteed best farm.” The source data does not provide measured hourly profit, guaranteed ore counts, or a universal optimal route. Your actual result depends on which deposits appear, how much mining you do, and how quickly you can reach and leave the target floors.
For route planning, the Village in the Shade map may help you orient yourself around the wider game world. It does not replace checking the Quarry’s own visible ropes, paths, and carts in your version.
Stamina and inventory decisions
Mining is only profitable in practical terms if the trip returns useful materials without consuming the resources needed for the rest of the day. The official introduction specifically emphasizes managing both time and stamina.
Use this simple decision loop at each checkpoint:
- Check the target. If you are on a progression run, continue only if the next cart is realistic. If you are on a material run, confirm that the target floor is still ahead.
- Check stamina. Keep a reserve for movement and the return route. Do not spend the final portion of your stamina on low-priority rocks.
- Check inventory. Keep space for the ore you entered to collect. Discarding or carrying unrelated items can turn a successful material run into a failed one.
- Check the tool result. If a rock cannot be mined efficiently or indicates a tool limitation, mark it mentally and return after checking upgrades.
- Use the cart. Once the checkpoint is secured, the run has produced lasting progress even if you leave immediately.
A progression run usually benefits from a mostly empty inventory, because its goal is access rather than maximum haul. A targeted run benefits from entering with a tighter item plan and leaving once the required material is obtained. Since the evidence does not establish guaranteed counts, set your own stopping rule—for example, “leave when the bag is nearly full” or “leave after enough ore for the next confirmed requirement”—instead of promising a specific number of nodes.
Combat can also affect whether a deep push is sensible. For general encounter preparation, see the Village in the Shade combat guide, but avoid treating combat advice as proof of a Quarry-specific enemy layout.
From Quarry ore to upgrade materials
Mining is only the first half of the material route. After returning to the village, separate ore from fuel and send it to the blast furnace when you are ready to process it.
The extracted processing records below list the same structure for Copper, Iron, Gold, and Meteoric Iron: five matching ore plus one charcoal or coal produces one ingot. The ingot descriptions indicate about 12 in-game hours; check your furnace display for the timer in your build. These are build-25311578 records, not a current-version timing test.
| Output | Ore input | Fuel input | Output | Item-description timing |
|---|---|---|---|---|
| Copper Ingot | 5 Copper Ore | 1 Charcoal or 1 Coal | 1 | About 12 in-game hours |
| Iron Ingot | 5 Iron Ore | 1 Charcoal or 1 Coal | 1 | About 12 in-game hours |
| Gold Ingot | 5 Gold Ore | 1 Charcoal or 1 Coal | 1 | About 12 in-game hours |
| Meteoric Iron Ingot | 5 Meteoric Iron | 1 Charcoal or 1 Coal | 1 | About 12 in-game hours |
Extracted metal-processing recipes and ingot item descriptions
Plan the handoff before your mining trip:
- Check the recipe in your own game before committing scarce fuel.
- Count ore in groups of five if your goal is an ingot.
- Bring back fuel separately if the furnace requires it in your current version.
- Start processing after confirming that the material is not needed in raw form.
- Check the furnace display rather than treating snapshot timing as a promise about every current build.
The selected data does not establish exact Anvil upgrade inputs, upgrade delays, or which tool tier opens each Quarry material. When an upgrade is your reason for mining, inspect the in-game requirement first, then choose the Quarry floor that can supply that material. This prevents a deep trip based on an assumed recipe.
A practical Quarry checklist
Use this compact routine for most trips:
- Choose progression or targeted material before leaving.
- Confirm the relevant ore’s earliest eligible floor.
- Check tool readiness without assuming a complete tier gate.
- Leave inventory space for the target ore.
- Set a 10-floor checkpoint objective.
- Mine selectively instead of clearing every rock.
- Activate the cart when you reach it.
- Retreat when stamina, inventory, or tool limits make further mining inefficient.
- Sort ore and fuel at home.
- Verify the current furnace recipe before processing.
- Keep the next upgrade requirement visible so the next run has a purpose.
FAQ
What is the earliest floor for Iron in Village in the Shade?
Iron first appears in the extracted normal-floor snapshot at floor 41. This is an earliest eligible record, not a guaranteed Iron deposit.
Does starting with a 10-floor goal unlock the story?
No. A 10-floor target is a route-management recommendation based on the Quarry’s cart checkpoints. It should not be treated as a documented story condition.
Where should I mine Gold?
Gold first becomes eligible at floor 81 in the snapshot. Later recorded floors also include Gold, but the data does not prove a guaranteed best farming band or a fixed amount per run.
How much ore makes one ingot?
The extracted processing records list five matching ore plus one Charcoal or Coal for one ingot, and item descriptions indicate about 12 in-game hours. Verify the recipe and timer in your own build before committing materials.
Continue with related guides
- Farming and seasonal crops
- Anvil and tool upgrades
- Helping task checklist
- Story progression
- Income planning
Media sources

Related Articles
community
Village in the Shade Discord: Publisher and Player Communities
NIS America’s Discord is a publisher community that can help you find other Village in the Shade players.
community
Village in the Shade Official Website and Store Links
The official English Village in the Shade website is operated by NIS America, with a separate Japanese site from Nippon Ichi Software.
community
Village in the Shade Reddit: Reviews, Help, and Spoiler Etiquette
Reddit discussions can help you compare player impressions of Village in the Shade, but they are not official patch notes.
Was this helpful?
Thanks for the feedback!